Organizing a Craft Room - Intro
Hi there! I am so happy you are here reading my blog in 2015. 2015 is going to be a busy year for The Shambled Shack. Its been a few years since I made any posts...a LOT has happened. I am looking forward to getting back to posting in 2015. I can't promise I will post daily or even weekly, but I do promise to get a post or two in each month at the minimum. This post makes my 2nd post for January and for 2015.
January, for The Shambled Shack, is going to be about organizing a craft room. I do not fully expect to have my craft room completed by the end of January - though wouldn't that be lovely! My expectation though, is to have worked on the room at least a couple times a week. I will be organizing around my daughter while she is staying with me temporarily. Her area consists of a cot in my craft room and plenty of boxes/bags of her belongings here and there and well, quite frankly, every where.
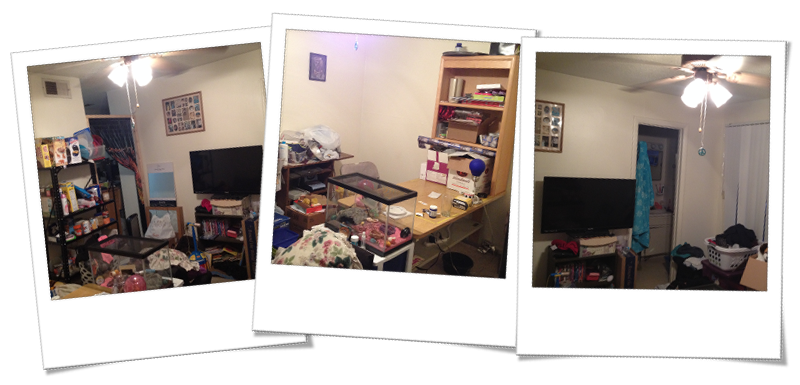
Let me begin my Organizing a Craft Room series by giving you a mini photo tour.
As you can see, this room needs tons of work! I have my basic crafting table and hutch moved in and a rolling cart (center photo), but everything else has yet to be moved out, items sorted and organized and moved back in. Below is my general overall plan for the room:
Items with a dotted blue border are on wheels and will be mobile.
The Half Shelf with Table Top still needs a table top. The half shelf is fairly short, I have two Michael's Recollection cubes that will go on either end bringing the overall height to 41 inches tall. I will put a table top (which I still have yet to purchase) over the shelves and add a back board covered with pretty wall paper. I plan to use the back board for my ikea bygel rods and my wall mounted ink pad holders (making the entire thing movable and without damaging my apartment walls).
Eventually, each of the metal shelves will be replaced with matching wood shelves in oak finish. My Half Shelf and Wooden Tall Shelf are already oak finish.
The Rolling Paper Bin is just two milk crates stacked with wheels on the bottom and hanging file folders in the top crate.
I have another plastic drawer that hasn't been placed on my floor plan as of yet - still not sure where I will be putting it. It currently houses a ton of crap that needs culling.
I have an over the door shoe rack that will be hung from my closet door - and may pick up another one.
I have lots of plans with limited time to accomplish them all since I work full-time outside the home. My next steps are to pull items out of the room and get the rest of the furniture situated as well as sort through and organize my craft tools and supplies.
Thanks for reading. I'd love to see how you have organized your craft rooms so leave a link to your blog in the comments section! If you are currently doing some sort of an organization project, feel free to share your link here too - doesn't matter what room it is - great organizational ideas can be picked up from any room in the home.
Check back in a week or so for my next post in this series.


Comments
Post a Comment